Need Help? Get in touch with us Call
Follow Us
Need Help? Get in touch with us Call
Follow Us

Making the switch to solar energy is one of the smartest investments you can make for your home and the environment. But if you’ve never gone through the process, the journey from initial interest to flipping that switch on your new solar system can feel overwhelming. What actually happens between calling a solar company and watching your electric meter spin backward? Understanding the residential solar installation process helps you know what to expect, make informed decisions, and work effectively with your installation team. Let’s walk through each phase of bringing clean, renewable energy to your home so you can approach this exciting upgrade with confidence.
Residential solar installation typically follows six main phases: initial consultation and site assessment, custom system design, permitting and approvals, equipment procurement, physical installation (usually 1-3 days), and final inspection with grid connection. The entire process from signing a contract to having a working system generally takes 1-3 months, with most of that time spent on paperwork rather than actual construction.
Your solar journey starts with understanding your energy needs. A reputable installer will review your current electricity bills, typically examining at least 12 months of usage to identify patterns and peak consumption periods. This isn’t just about calculating how many panels you need; it’s about designing a system that matches your lifestyle.
During the site assessment, professionals evaluate several critical factors. They’ll examine your roof’s condition, age, and structural integrity, since solar panels last 25-30 years and you don’t want to install them on a roof that’ll need replacement in five years. Orientation and pitch matter tremendously. South-facing roofs with slopes between 15-40 degrees are ideal, though east and west-facing orientations can work well too.
Shading analysis is crucial. Trees, chimneys, and neighboring buildings can dramatically impact your system’s performance. Modern installers use specialized tools to map sun exposure throughout the year, identifying any obstacles that might cast shadows on your panels during peak production hours.
Once your installer understands your property and energy goals, they’ll design a system tailored specifically for you. This goes beyond just slapping panels on your roof; it’s about optimizing production, aesthetics, and long-term performance.
Your proposal should include several key components:
Don’t rush this stage. Review the proposal carefully and ask questions about anything unclear. At Light Switch Solar, we walk you through every detail to ensure you understand exactly what you’re getting and how your investment will pay off over time.
Here’s where most of the timeline gets eaten up, but it’s essential for a legal, safe installation. Your installer handles the heavy lifting, but understanding the process helps set realistic expectations.
Building permits ensure your installation meets local electrical and structural codes. Your installer submits detailed plans to your municipality, including electrical diagrams, structural calculations, and equipment specifications. Approval times vary widely; some jurisdictions respond within days, while others take weeks.
Utility interconnection agreements are equally important. These documents establish how your system connects to the grid, how excess power is credited to your account (net metering), and what happens during outages. Your utility company needs to review and approve your system before you can legally generate power.
Homeowners association approvals (if applicable) can add another layer. While many states have “solar rights” laws limiting HOA restrictions, you’ll still need to submit plans and potentially negotiate placement or appearance details.
Once permits are approved, your installer orders equipment and schedules your installation. Lead times for solar panels, inverters, and mounting hardware vary based on manufacturer availability and supply chain conditions. Premium equipment might take longer to arrive, but the wait is usually worth it for higher efficiency and better warranties.
Your installer should communicate proactively during this phase, keeping you updated on the arrival of equipment and proposed installation dates. Weather, crew availability, and permit expiration dates all factor into scheduling, so some flexibility helps keep things moving smoothly.
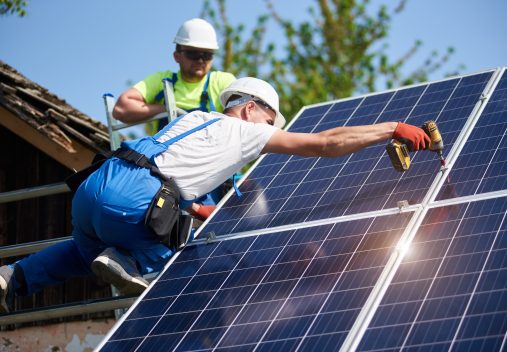
This is when things get exciting and surprisingly quick. Most residential installations are complete in 1-3 days, depending on system size and roof complexity.
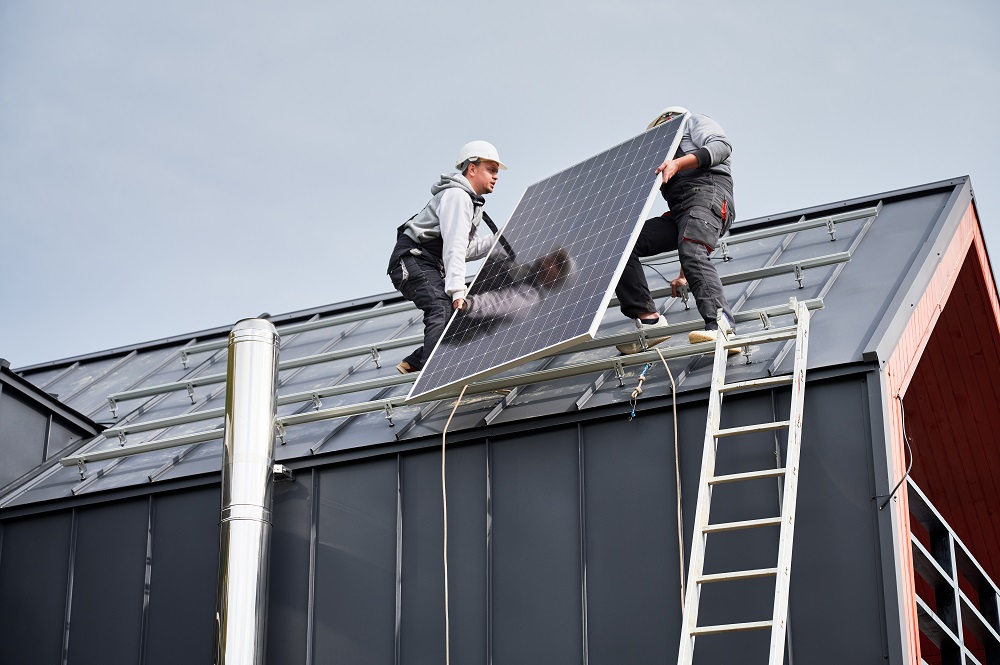 1. Setting up safety equipment and protecting your property
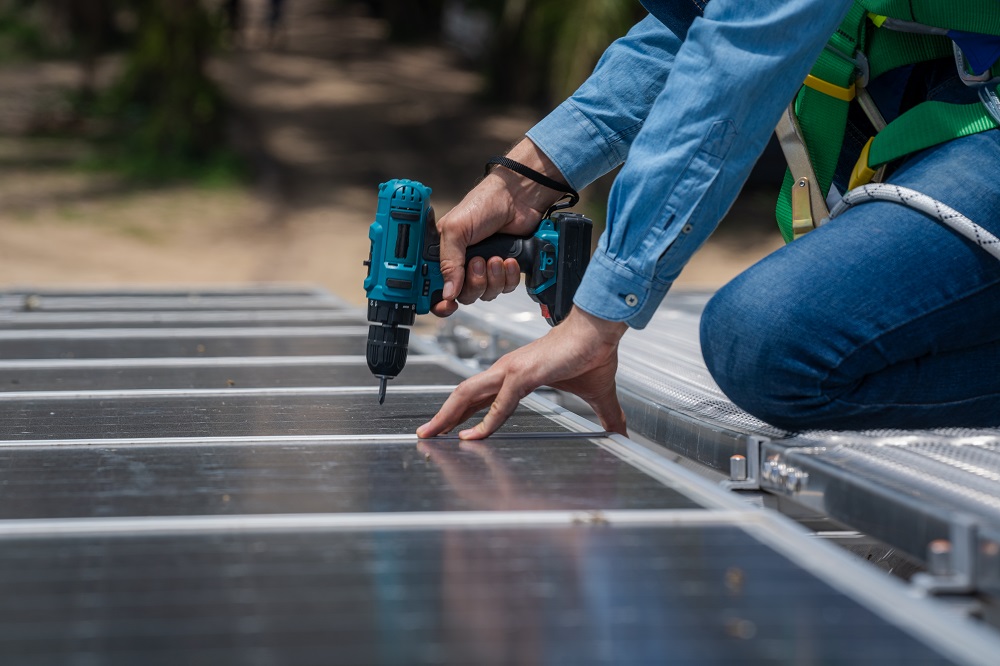
2. Installing mounting hardware and racking systems
3. Running conduit for electrical connections
4. Beginning panel installation on completed racking sections
5. Completing panel installation and securing all connections
6. Installing inverter(s) and associated equipment
7. Running wiring from the roof to the inverter to the electrical panel
8. Testing all connections for proper operation
9. Final electrical work and system integration
10. Initial system testing and safety checks
11. Cleanup and property restoration
Professional installers work efficiently while prioritizing safety and quality. You’ll likely see a crew of 2-4 technicians coordinating seamlessly to bring your system online. The process involves some noise and activity, but reputable companies minimize disruption and leave your property clean.
You’re almost there, but two final hurdles remain before you start generating power. First, your local building department must inspect the completed installation to verify it meets all code requirements. This inspection covers electrical work, structural mounting, and safety systems like rapid shutdown equipment.
After passing the building inspection, your utility company performs its own inspection or review. They’re verifying that your system meets their interconnection standards and won’t cause problems for the broader grid. Once approved, they’ll install a bidirectional meter (if needed) that tracks both the power you draw from the grid and the excess you send back.
Permission to operate (PTO) is the final milestone. This official approval from your utility allows you to activate your system and start offsetting your electricity costs. Some utilities grant PTO immediately after inspection, while others take days or weeks to process paperwork.
## Common Timeline Expectations
Let’s be realistic about how long this takes. From contract signing to producing power, expect 1-3 months for most residential installations. Here’s how that typically breaks down:
These timeframes overlap equipment orders while waiting for permits, for example, so the total process is shorter than adding each phase individually. That said, complications happen. Permit office backlogs, HOA negotiations, or equipment delays can extend timelines. Weather rarely causes major delays except in extreme conditions.
Once your system is operational, modern monitoring technology lets you track production in real-time through smartphone apps or web portals. You’ll see exactly how much power you’re generating, how much you’re consuming, and what you’re sending back to the grid.
Maintenance requirements are minimal but important. Solar panels need occasional cleaning, especially in dusty areas or after pollen season. Most installers recommend professional cleaning 1-2 times per year, though rain handles basic dust removal. Inverters might need replacement after 10-15 years, while panels typically maintain 80-90% efficiency after 25 years.
We provide comprehensive monitoring services and maintenance support to ensure your system operates at peak performance year after year. Regular check-ins help identify any issues before they impact production.
Understanding the residential solar installation process empowers you to make informed decisions and set realistic expectations. Yes, there’s paperwork involved. Yes, you’ll need patience during the permitting phase. But the payoff of decades of clean energy, lower utility bills, and increased home value makes the temporary inconvenience worthwhile.
The most important decision you’ll make is choosing the right installation partner. Look for experienced professionals who communicate clearly, handle permits efficiently, and stand behind their work with solid warranties. At Light Switch Solar, our dedicated team guides you every step of the way, from initial consultation to final activation and beyond, ensuring your transition to solar energy is smooth and successful.
Ready to harness the power of the sun? Contact us today for a free consultation and customized system design. Together, let’s pave the way toward a cleaner, more sustainable future for your home and our community.
Costs vary based on system size, equipment quality, and location, but most residential systems range from $15,000-$30,000 before incentives. The federal solar tax credit currently covers 30% of installation costs, and many states offer additional rebates or incentives that further reduce your investment.
Absolutely. You can maintain your normal routine during installation. Installers work primarily on your roof and outside your home. You might experience a brief power interruption when they connect to your electrical panel, but they’ll coordinate this with you in advance.
Standard grid-tied systems shut down automatically during outages for safety reasons, protecting utility workers repairing lines. If you want backup power during outages, you’ll need to add battery storage to your system, which allows you to keep essential appliances running when the grid goes down.
When installed properly by certified professionals, solar panels actually protect the roof sections they cover from weather exposure. Reputable installers use mounting systems specifically designed to maintain your roof’s waterproof integrity and include warranties covering any installation-related damage.
Address
Houston, TX
Phone No: